When I moved to Japan in 1993 I left my slingshot behind in the US, but I still get the urge to break out a slingshot and shoot at targets. After watching The Slingshot Channel and visiting The Slingshot Community Forum countless times, I had to have a slingshot of my own again.So what do you do when you have the urge for a slingshot and access to a 3D printer? You design and print one of course!
I kept the design small and put on some light bands for shooting in the backyard to scratch the slingshot itch.
A customizable version with all the files is available on Thingiverse.
In a recent # [ WTF Marc Maron podcast with the Hollywood producer Brian Grazer (episode 663 starting at about 36:30)] (http://www.wtfpod.com/podcast/episodes/episode_663_-_brian_grazer) they talk about what Brian calls “the sexy hook” for selling an idea. The sexy hook is:
A good title
A singular sentence that defines what you are trying to achieve
An emotional destination
This struck me as a very succinct way to describe a good pitch, especially the emotional destination. When pitching an idea, I often find myself getting caught up in what I’m trying to achieve and being light on selling the outcome. Framing the pitch as a story with an emotional destination is the difference between the pitch being sexy story or just hmmm.
We’ve been living with this notion that making stuff is an illiberal art for commercial gain and it’s not part of the means of expression. But, in fact, today, 3D printing, micromachining, and microcontroller programming are as expressive as painting paintings or writing sonnets but they’re not means of expression from the Renaissance. We can finally fix that boundary between art and artisans.
…
Over the next maybe five years we’ll be transitioning from buying machines to using machines to make machines. Self-reproducing machines. But they still have consumables like the motors, and they still cut or squirt. Then the interesting transition comes when we go from cutting or printing to assembling and disassembling, to moving to discretely assembled materials. And that’s when you do tabletop chip fab or make airplanes. That’s when technical trash goes away because you can disassemble.
An amazing one hour talk from the director of MIT’s Center for Bits and Atoms, Neil Gershenfeld on the digital fabrication, what it is, what it means for the future, and how we are getting there.
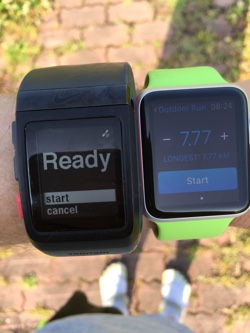
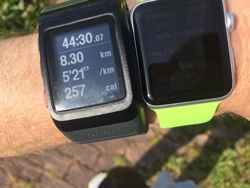
Japanese text can be thought of a mixture of Chinese characters known as Kanji, and the two phonetic alphabets of Hiragana and Katakana. Japanese text has no white spaces between words and one Kanji character can stand in for a whole word. This makes it difficult calculate how to fairly change clients for Japanese to English translation work. In Japan, the loosely agreed procedure is to charge by the letter, but when charging for every single letter, there are some characters that must be removed before calculating the total per letter fee. Some examples are English letters, numbers, white spaces, carriage returns, periods and other symbols in both Japanese and English. Removing these characters changes the text below from 135 characters
A significant difference when the translation work is priced by letters.
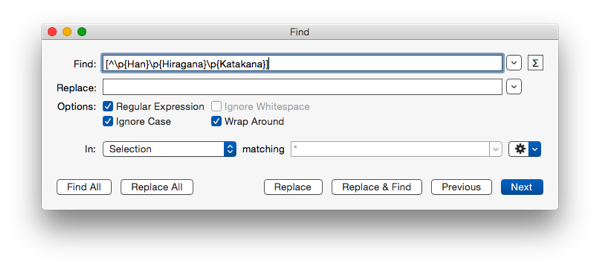
So how exactly do you remove all the cruft for the calculation? You could combing through the text yourself and manually delete letters one by one but Ain’t Nobody Got Time for That! So regex to the rescue. If the text is in Unicode the following regex will match any characters, including symbols, that are not Kanji, Katakana, or Hiragana.
[^\p{Han}\p{Hiragana}\p{Katakana}]
Use it in a text editor that has a regex friendly find and replace, like TextMate and done.
In Japan is customary for women to give men chocolates on Valentine’s Day, and men to return the favour with white chocolate on March 14, White Day. It’s easy enough to pop down to the store and buy a few boxes of chocolate, but it displays a certain lack of imagination. This year, all the women I will be giving chocolates to this year are Harry Potter fans and so I figured that some appropriately shaped chocolates would be in order. Luckily Anna Kaziunas France from the FabLab network has a great instructable on molding white chocolate skulls and I came across some greathousecrestmodels on (where else) Thingiverse that fit the bill.
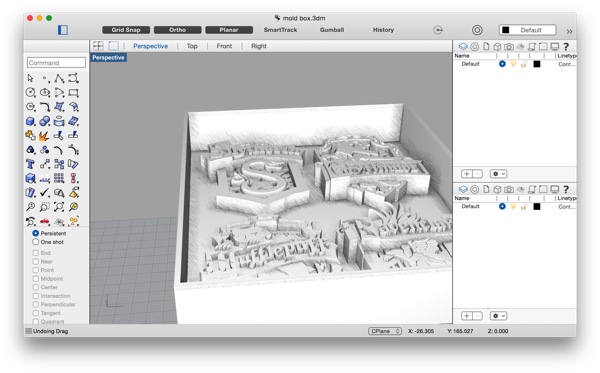
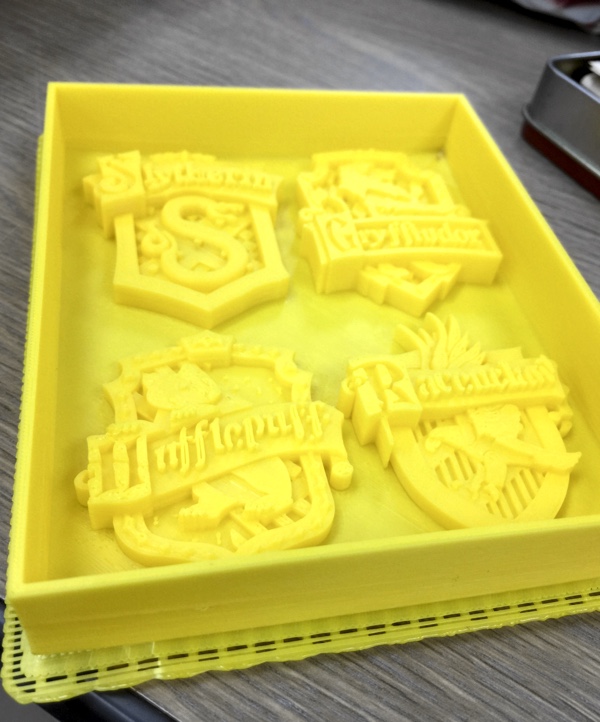
The first step is to create and print the box and positive model that will be cast in food safe silicone. I downloaded the crest models and modified Anna’s original OpenSCAD file to work with the models. I spent quite a bit of time modifying the program to be able to dynamically change the sizes of the box, the desired output size, and evenly distribute the maximum the number of crests in the box. Unfortunately, due the to properties of the original crest models, OpenSCAD was unable to render and produce a final stl file with the crests.
Instead, I imported the box model into Rhino from OpenScad, placed the crests models in the box, and generated the stl for printing.
The print came out well, but due to the reduced sizes of each crest some of the fine detail was lost, especially around the lettering. Less detailed models will not only print better, but produce silicone mold that is easier to use. Eventually, the box will need to be destroyed to remove the cured mold, so do not make the printed box so thick or strong that you can’t easily tear it apart. A wall thickness of 1.3mm produced a mold maker with no significant leaks that was easy to tear apart.
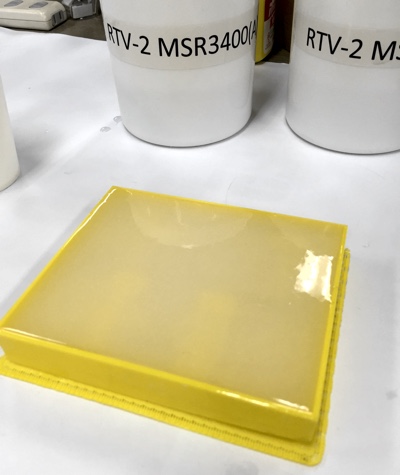
I purchased 1kg of very easy to use food safe silicon from Amazon. This silicon reacts badly to water or pollutants on the print, environmental contaminants such as tobacco smoke, and will not set properly in low temperature environments. A temperature controlled room, a careful cleaning with alcohol, and a complete drying is recommended.
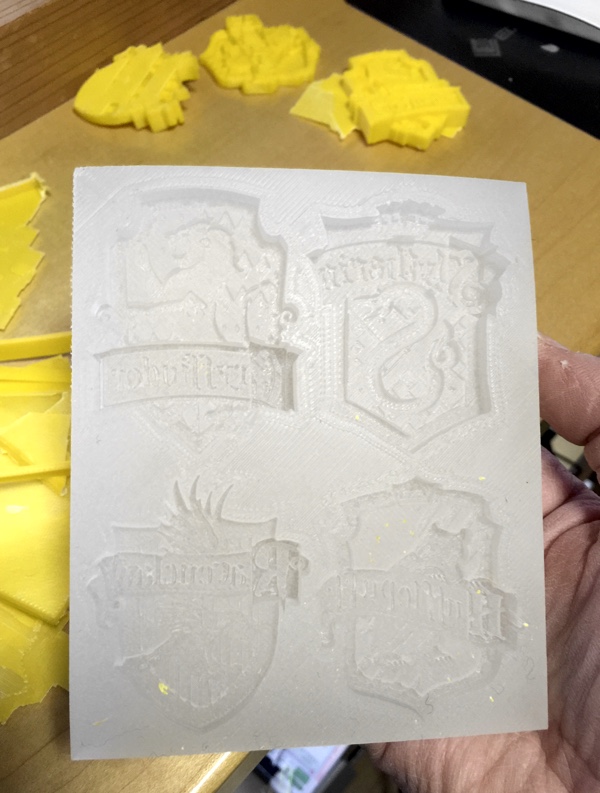
To calculate the required amount of silicon for the mold, subtract the volume of each crest from the the volume of the box. Next I measured out half the volume of both the A and B materials into 2 paper cups, poured them into a 3rd larger cup, and gently mixed them together. Care must be taken to make sure the two materials are throughly blended together while not introducing air bubbles into the final mixture. The silicon I used has a working time of about 30 minutes and I spent that time tapping the box from all sides and the bottom to remove air bubbles. The details of the design trapped a surprising amount of air and the final mold has a couple small bubbles that were trapped in the crevasses of the design. The temperature needs to be controlled as the silicon cures over the next 8 hours. I left the heat in the room and while it was cooler in the room than recommended, there where no problems. The next morning I was able to remove the cured silicon mold from the printed box by tearing apart the box with my hands and a needle-nose pliers.
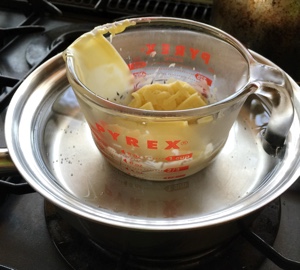
On to the chocolate!
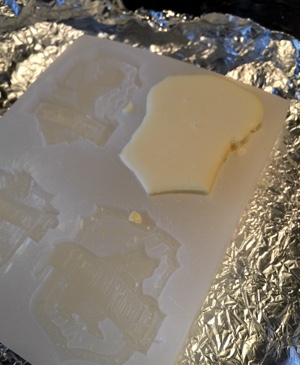
I next melted bars of white chocolate using a glass measuring cup and a water bath, being very careful not to get any water in the chocolate or drip water into the mold. It will save you time and trouble if you can get chocolate that doesn’t require tempering. Unfortunately, my chocolate did. To temper the chocolate, I first heated the chocolate up to about 46 C monitoring the temperature is an IR thermometer. Next, while gently stirring I cooled it down to below 27 C. Again care must be taken to not introduce air bubbles into the chocolate while stirring especially as it thickens. Finally, I reheated the chocolate to about 32 C and gently poured it into the mold while tapping to help it spread evenly and minimise bubbles. The chocolate sets up quickly so a smooth but relatively fast pour is recommended, but be careful not to trap excessive air in the mold.
Due to the detailed faces of the crests, the chocolates stuck quite firmly in the mold but the thinness of the design made them very easy to break. It’s not good for the chocolate, but I had to completely freeze the mold in order to successfully remove the chocolates. Even so, frozen chocolate is very brittle and I ended up breaking quite a few of the Gryffindor and Slytherin crests, probably due to the large variations in thicknesses from lettering to the underlying animal motifs. I susspect that a design with a more consistent thickness would be considerably easier to demold successfully. Fortunately, broken chocolates can be melted and reuse to try-try-again.
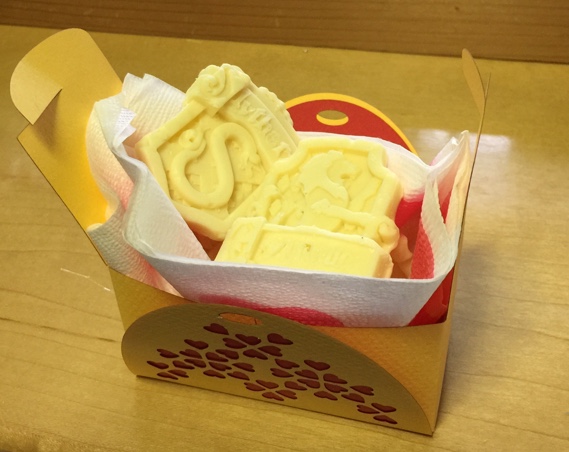
The final results came out better than I had expected, even if the lettering is not very distinct.
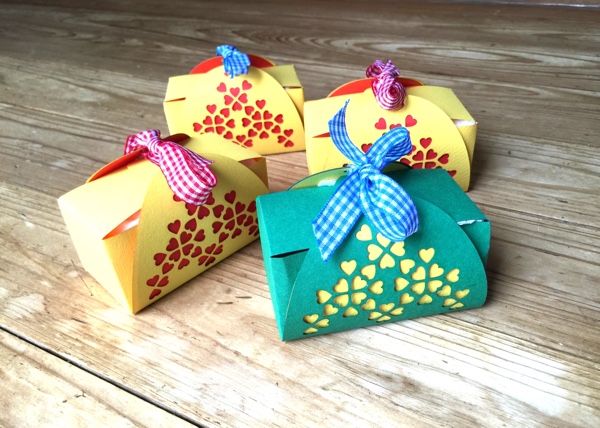
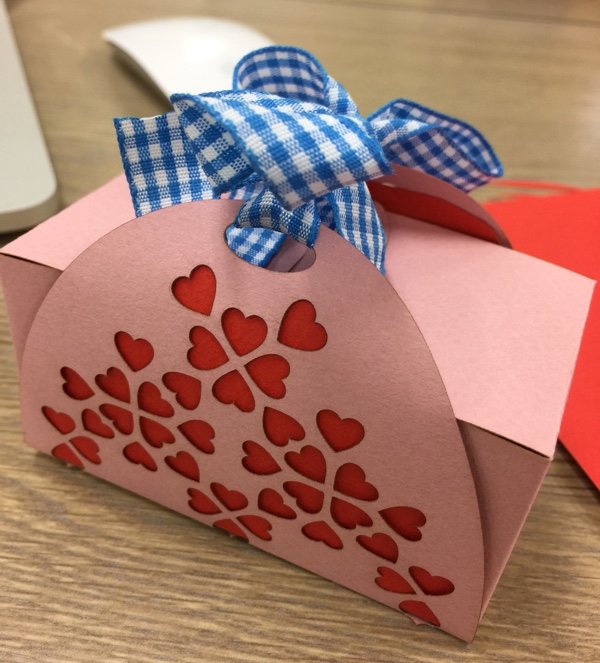
For the finishing touch, I laser cut some of my Valentine’s Day gift boxes which are the perfect size for a set of four chocolates.
Being empty handed on Valentine’s Day is never a good idea, so with that in mind I whipped up a quick little gift box out of paper.
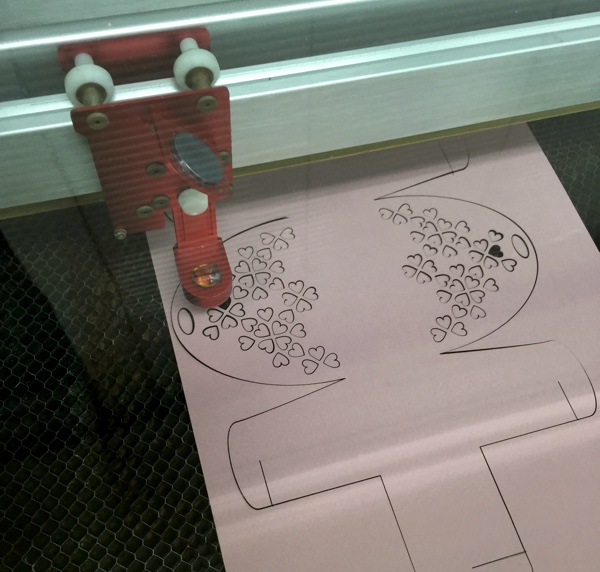
With a little work in Illustrator, quick job on the laser cutter, fold it up, attach ribbon and done. The best part is that by switching out the hearts for a message and changing the paper colour this design can be tweaked and reused again for other small gifts etc. Adding a custom sticker on the top lid to seal the box would be a nice professional touch too.
Recently an app I develop needed to keep the map center while zooming in/out to show all markers dropped on the map. It’s not a particularly difficult thing to do, but it took a moments thought. The example is for Android, but it works the same way on iOS etc.
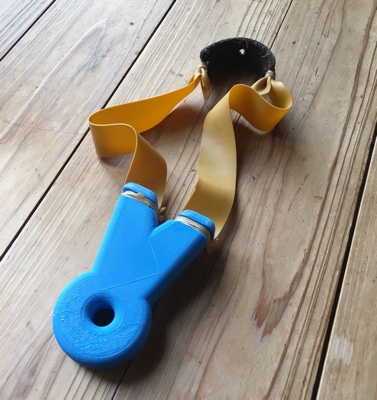
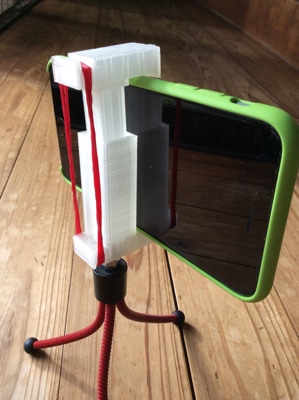
I’ve been dying to try out the new time lapse photography on my 6+, but I haven’t had a great way to attach the larger iPhone to a camera stand. I could order up one from Amazon or something, but this is something that just screams for 3d printing.
I whipped up a quick clamp design that would fit the large phone and subtracted a hex hole for the mounting nut. One printout, some hot glue, and a few rubber bands later I had a camera mount.
The first version is fine for my purposes but the tolerances on the slider should be tighter, the edges in the band groves should be rounded to prevent band wear, and the whole thing could be slimmed down a bit to use less materiel.
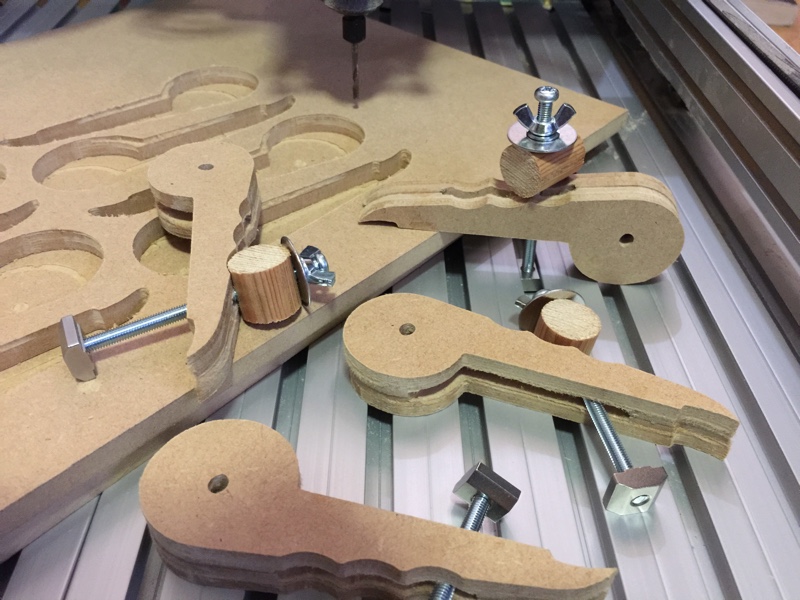
Now that my Shapeoko has a nice t-slot aluminum bed, I needed some work holding clamps. The great thing about CNC machines and 3d printers is that you can often make parts to improve your machines with the machines themselves.
For any CNC work, it is a must to keep the workpiece held firmly while milling. There are many ways to do this with bolts, tape, metal clamps etc. The slots in the t-slot bed can be positioned inconviently for a particular piece and tape can come undone partway through milling not to mention the occasional tape residue left on the bed. Premade clamps are availaible or printable out of plastic, but I wanted to make at least part of something for the machine with the machine itself.
Inventables has created a cam tool specifically for use with the Shapeoko called Easel that’s simple to use. Upload a SVG file, set up the materiel, arrange the parts layout, connect and mill. The CAM functionality of Easel is minimal, no tab support etc, but it works well for more simple jobs and has very easy to follow instructions. Files can be shared with links or published to Inventables.
Creating the cut file was a simple matter of taking a very nice existing clamp design from thingiverse, cleaning up the 2d data, and modifying the design and material settings to match the 9mm MDF I had at hand.
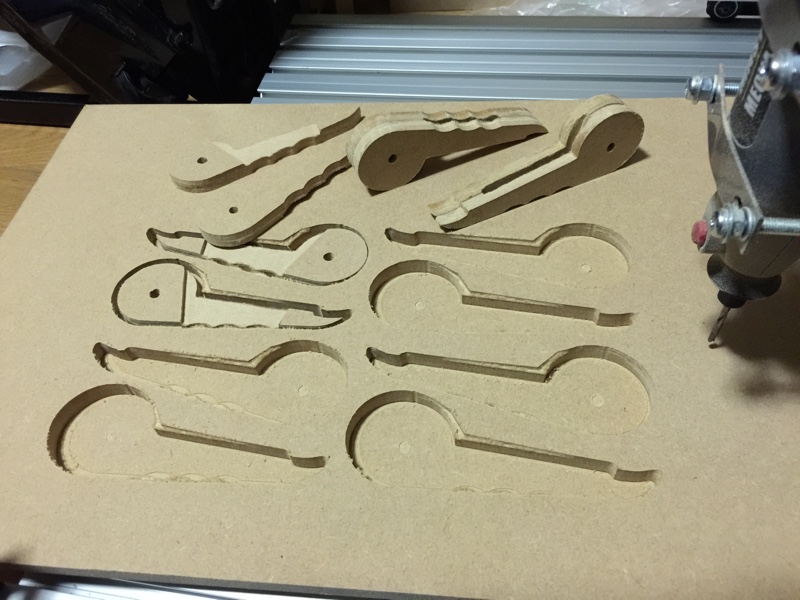
For some reason, Easel marked several areas in red that might be problematic, but after checking the tool paths and the design this was a false warning and I milled the pieces anyway. Milling the clamps (link) was a smooth and trouble-free process. The only quibble I had about Easel besides the lack of tab support was that the tool paths were not optimised very well and resulted in significant wasted movement. Some of that could possible be improved by altering the design, but still the milling took much longer than otherwise necessary.
After cutting, glue the halves together, clamp and let them dry. Next, drill a hole and cut off a short piece (roughly 18mm) of 20mm dowelling. When the glue has dried, add a bolt, washers, a wing nut, and an insertion nut for the t-slots and the clamps will be ready to go. Wooden clamps are great if you happen to make a mistake and run the tool through one, destroying the clamp but saving the end mill (hopefully).


 The
The 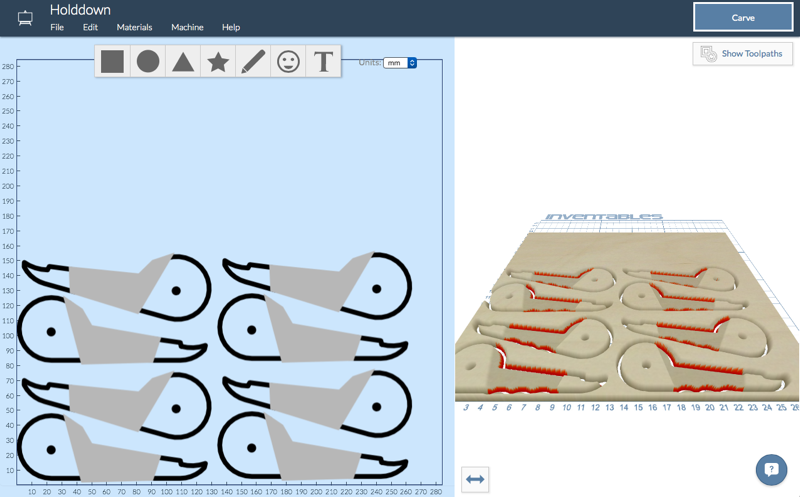
 After cutting, glue the halves together, clamp and let them dry. Next, drill a hole and cut off a short piece (roughly 18mm) of 20mm dowelling. When the glue has dried, add a bolt, washers, a wing nut, and an insertion nut for the t-slots and the clamps will be ready to go. Wooden clamps are great if you happen to make a mistake and run the tool through one, destroying the clamp but saving the end mill (hopefully).